Generate a self-signed root certificate
Create a self-signed root certificate:
Use the New-SelfSignedCertificate cmdlet to create a self-signed root certificate. For additional parameter information, see New-SelfSignedCertificate.
From a computer running Windows 10 or Windows Server 2016, open a Windows PowerShell console with admin privileges.
Use the following example to create the self-signed root certificate.
PowerShell$cert = New-SelfSignedCertificate -Type Custom -KeySpec Signature ` -Subject "CN=P2SRootCert" -KeyExportPolicy Exportable ` -HashAlgorithm sha256 -KeyLength 2048 ` -CertStoreLocation "Cert:\CurrentUser\My" -KeyUsageProperty Sign -KeyUsage CertSignLeave the PowerShell console open if you want to create a client certificate right after creating this root certificate.
Generate a client certificate
Each client computer that connects to a VNet using Point-to-Site must have a client certificate installed. You generate a client certificate from the self-signed root certificate, and then export and install the client certificate. If the client certificate is not installed, authentication fails.
The following steps walk you through generating a client certificate from a self-signed root certificate. You may generate multiple client certificates from the same root certificate. When you generate client certificates using the steps below, the client certificate is automatically installed on the computer that you used to generate the certificate. If you want to install a client certificate on another client computer, you can export the certificate.
The examples use the New-SelfSignedCertificate cmdlet to generate a client certificate that expires in one year. For additional parameter information, such as setting a different expiration value for the client certificate, see New-SelfSignedCertificate.
Example 1 - PowerShell console session still open
Use this example if you have not closed your PowerShell console after creating the self-signed root certificate. This example continues from the previous section and uses the declared '$cert' variable. If you closed the PowerShell console after creating the self-signed root certificate, or are creating additional client certificates in a new PowerShell console session, use the steps in Example 2.
Modify and run the example to generate a client certificate. If you run the following example without modifying it, the result is a client certificate named 'P2SChildCert'. If you want to name the child certificate something else, modify the CN value. Do not change the TextExtension when running this example. The client certificate that you generate is automatically installed in 'Certificates - Current User\Personal\Certificates' on your computer.
New-SelfSignedCertificate -Type Custom -DnsName P2SChildCert -KeySpec Signature `
-Subject "CN=P2SChildCert" -KeyExportPolicy Exportable `
-HashAlgorithm sha256 -KeyLength 2048 `
-CertStoreLocation "Cert:\CurrentUser\My" `
-Signer $cert -TextExtension @("2.5.29.37={text}1.3.6.1.5.5.7.3.2")
Example 2 - New PowerShell console session
If you are creating additional client certificates, or are not using the same PowerShell session that you used to create your self-signed root certificate, use the following steps:
Identify the self-signed root certificate that is installed on the computer. This cmdlet returns a list of certificates that are installed on your computer.
PowerShellGet-ChildItem -Path "Cert:\CurrentUser\My"Locate the subject name from the returned list, then copy the thumbprint that is located next to it to a text file. In the following example, there are two certificates. The CN name is the name of the self-signed root certificate from which you want to generate a child certificate. In this case, 'P2SRootCert'.
Thumbprint                                Subject

AED812AD883826FF76B4D1D5A77B3C08EFA79F3F  CN=P2SChildCert4
7181AA8C1B4D34EEDB2F3D3BEC5839F3FE52D655  CN=P2SRootCert
Declare a variable for the root certificate using the thumbprint from the previous step. Replace THUMBPRINT with the thumbprint of the root certificate from which you want to generate a child certificate.
PowerShell$cert = Get-ChildItem -Path "Cert:\CurrentUser\My\THUMBPRINT"For example, using the thumbprint for P2SRootCert in the previous step, the variable looks like this:
PowerShell$cert = Get-ChildItem -Path "Cert:\CurrentUser\My\7181AA8C1B4D34EEDB2F3D3BEC5839F3FE52D655"Modify and run the example to generate a client certificate. If you run the following example without modifying it, the result is a client certificate named 'P2SChildCert'. If you want to name the child certificate something else, modify the CN value. Do not change the TextExtension when running this example. The client certificate that you generate is automatically installed in 'Certificates - Current User\Personal\Certificates' on your computer.
PowerShellNew-SelfSignedCertificate -Type Custom -DnsName P2SChildCert -KeySpec Signature ` -Subject "CN=P2SChildCert" -KeyExportPolicy Exportable ` -HashAlgorithm sha256 -KeyLength 2048 ` -CertStoreLocation "Cert:\CurrentUser\My" ` -Signer $cert -TextExtension @("2.5.29.37={text}1.3.6.1.5.5.7.3.2")
Export the root certificate public key (.cer)
After creating a self-signed root certificate, export the root certificate public key .cer file (not the private key). You will later upload this file to Azure. The following steps help you export the .cer file for your self-signed root certificate:
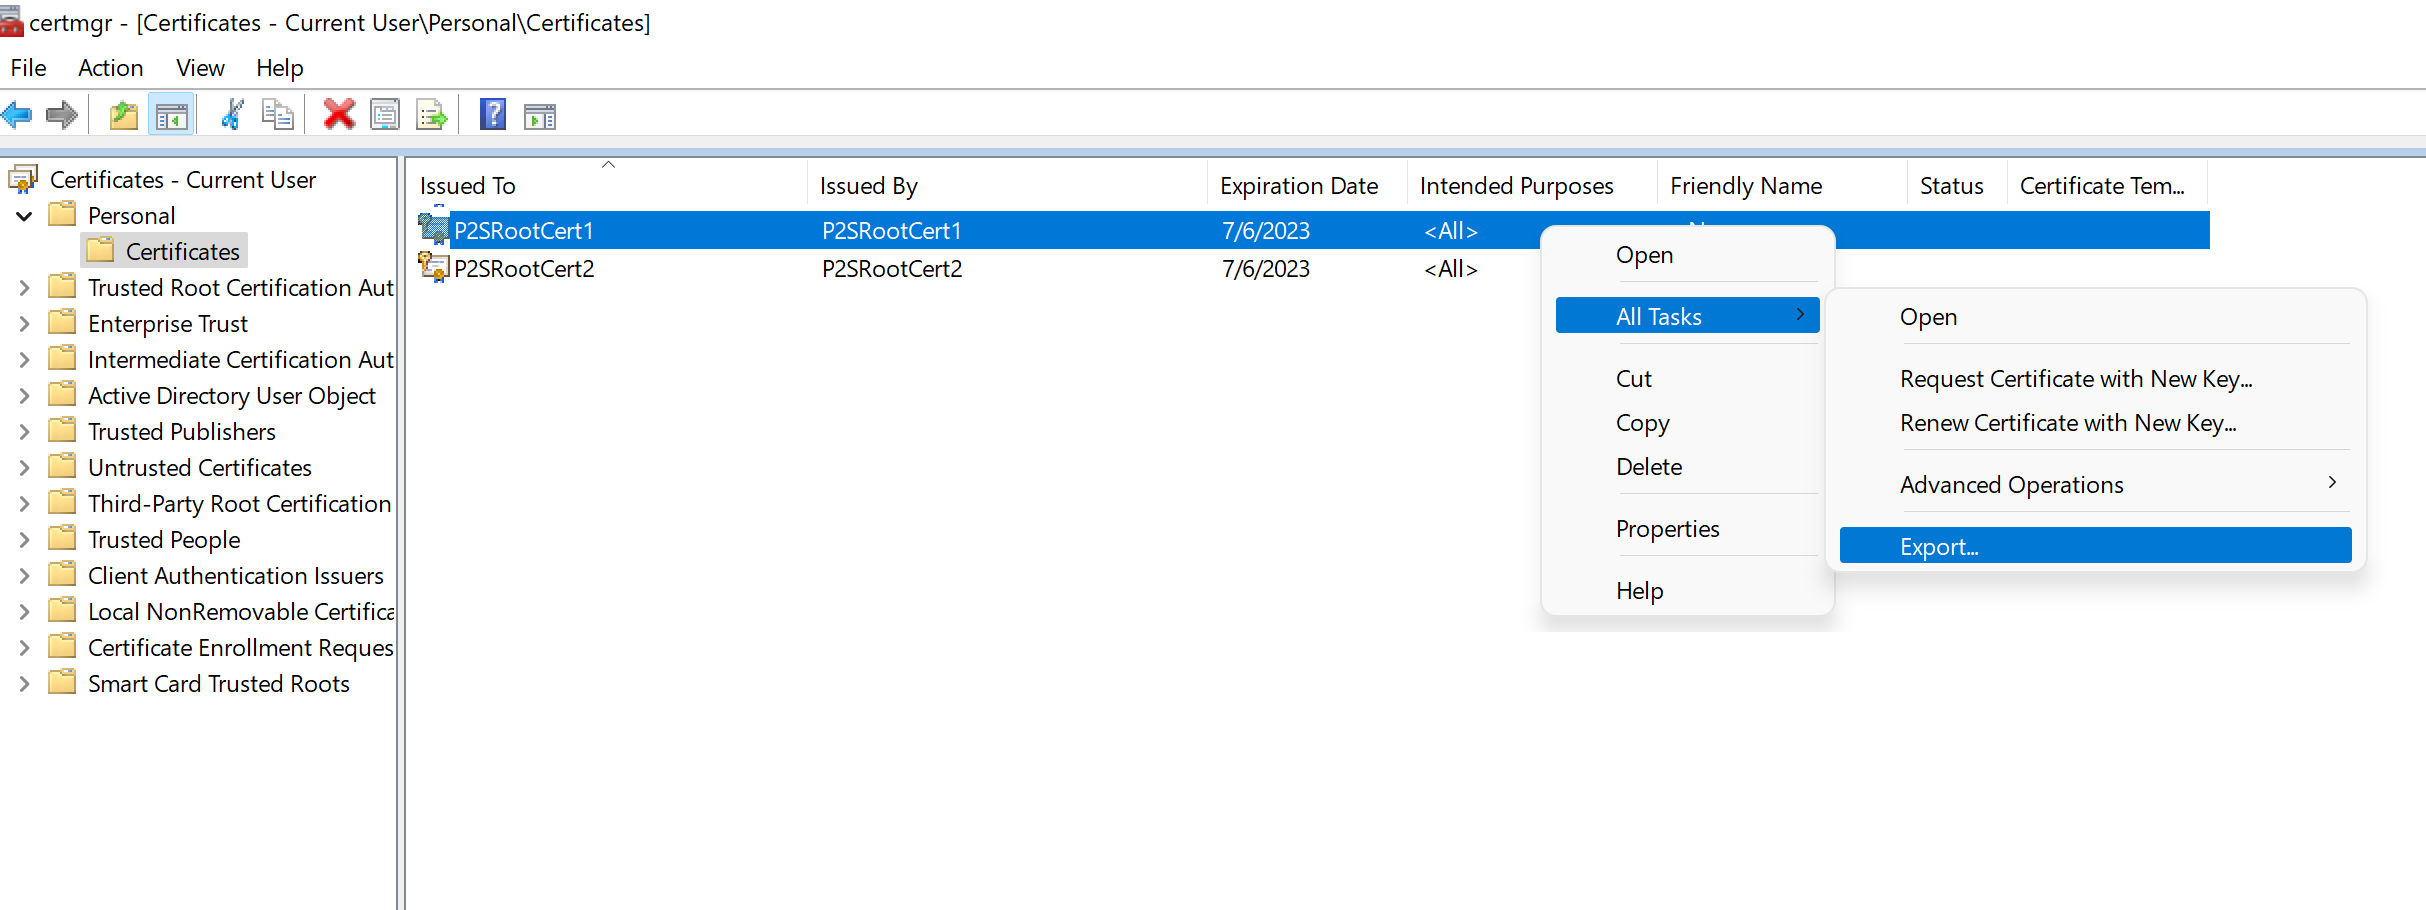
To obtain a .cer file from the certificate, open Manage user certificates. Locate the self-signed root certificate, typically in 'Certificates - Current User\Personal\Certificates', and right-click. Click All Tasks, and then click Export. This opens the Certificate Export Wizard. If you can't find the certificate under Current User\Personal\Certificates, you may have accidentally opened "Certificates - Local Computer", rather than "Certificates - Current User"). If you want to open Certificate Manager in current user scope using PowerShell, you type certmgr in the console window.
In the Wizard, click Next.

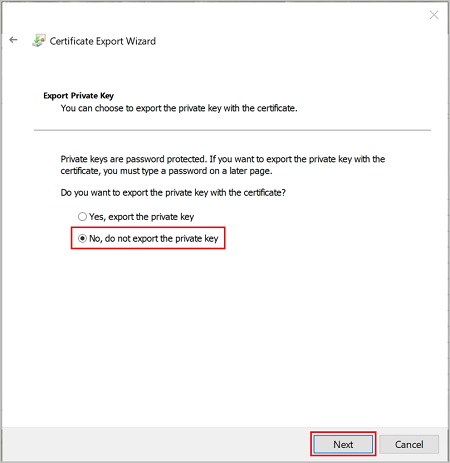
Select No, do not export the private key, and then click Next.
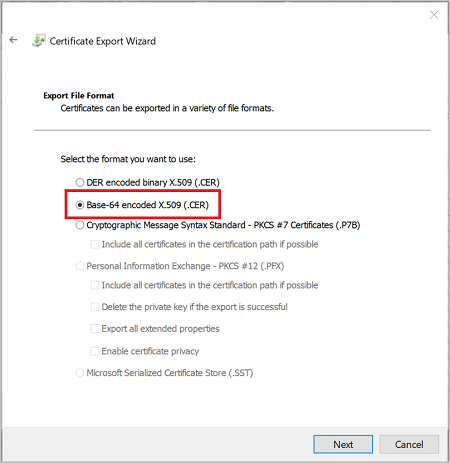
On the Export File Format page, select Base-64 encoded X.509 (.CER)., and then click Next.
For File to Export, Browse to the location to which you want to export the certificate. For File name, name the certificate file. Then, click Next.

Click Finish to export the certificate.
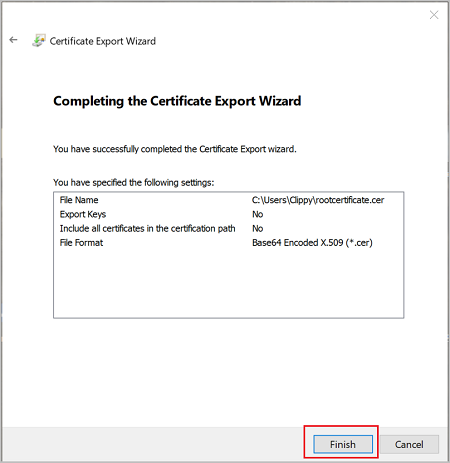
Your certificate is successfully exported.
The exported certificate looks similar to this:
If you open the exported certificate using Notepad, you see something similar to this example. The section in blue contains the information that is uploaded to Azure. If you open your certificate with Notepad and it does not look similar to this, typically this means you did not export it using the Base-64 encoded X.509(.CER) format. Additionally, if you want to use a different text editor, understand that some editors can introduce unintended formatting in the background. This can create problems when uploaded the text from this certificate to Azure.


Comments
Post a Comment