Azure Kubernetes Service (AKS)
Microsoft Azure Kubernetes Service (AKS)
You can create a Kubernetes cluster either through the Azure portal website, or using the Azure command line tools.
This page describes the commands required to setup a Kubernetes cluster using the command line. If you prefer to use the Azure portal see the Azure Kubernetes Service quickstart.
Prepare your Azure shell environment. You have two options, one is to use the Azure interactive shell, the other is to install the Azure command-line tools locally. Instructions for each are below.
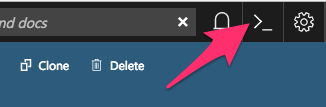
Using the Azure interactive shell. The Azure Portal contains an interactive shell that you can use to communicate with your Kubernetes cluster. To access this shell, go to portal.azure.com and click on the button below.
Install command-line tools locally. You can access the Azure CLI via a package that you can install locally.
To do so, first follow the installation instructions in the Azure documentation. Then run the following command to connect your local CLI with your account:
az login

You’ll need to open a browser and follow the instructions in your terminal to log in.
Activate the correct subscription. Azure uses the concept of subscriptions to manage spending. You can get a list of subscriptions your account has access to by running:
az account list --refresh --output table
Pick the subscription you want to use for creating the cluster, and set that as your default. If you only have one subscription you can ignore this step.
az account set --subscription <YOUR-CHOSEN-SUBSCRIPTION-ID>
Create a resource group. Azure uses the concept of resource groups to group related resources together. We need to create a resource group in a given data center location. We will create computational resources within this resource group.
az group create --location westus --resource-group <my-Resource-Group>
Choose a cluster name.
In the following steps we’ll run commands that ask you to input a cluster name. We recommend using something descriptive and short. We’ll refer to this as
<CLUSTER-NAME>for the remainder of this section.The next step will create a few files on your filesystem, so first create a folder in which these files will go. We recommend giving it the same name as your cluster:
mkdir <CLUSTER-NAME>
cd <CLUSTER-NAME>
Create an ssh key to secure your cluster.
ssh-keygen -f ssh-key-<CLUSTER-NAME>
It will prompt you to add a password, which you can leave empty if you wish. This will create a public key named
ssh-key-<CLUSTER-NAME>.puband a private key namedssh-key-<CLUSTER-NAME>. Make sure both go into the folder we created earlier, and keep both of them safe!This command will also print out something to your terminal screen. You don’t need to do anything with this text.
Create a virtual network and sub-network.
Kubernetes does not by default come with a controller that enforces
networkpolicyresources.networkpolicyresources are important as they define how Kubernetes pods can securely communicate with one another and the outside sources, for example, the internet.To enable this in Azure, we must first create a Virtual Network with Azure’s own network policies enabled.
This section of the documentation is following the Microsoft Azure tutorial on creating an AKS cluster and enabling network policy, which includes information on using Calico network policies.
az network vnet create \
   --resource-group <RESOURCE-GROUP-NAME> \
   --name <VNET-NAME> \
   --address-prefixes 10.0.0.0/8 \
   --subnet-name <SUBNET-NAME> \
   --subnet-prefix 10.240.0.0/16
where:
--resource-groupis the ResourceGroup you created--nameis the name you want to assign to your virtual network, for example,hub-vnet--address-prefixesare the IP address prefixes for your virtual network--subnet-nameis your desired name for your subnet, for example,hub-subnet--subnet-prefixesare the IP address prefixes in CIDR format for the subnet
We will now retrieve the application IDs of the VNet and subnet we just created and save them to bash variables.
VNET_ID=$(az network vnet show \
   --resource-group <RESOURCE-GROUP-NAME> \
   --name <VNET-NAME> \
   --query id \
   --output tsv)
SUBNET_ID=$(az network vnet subnet show \
   --resource-group <RESOURCE-GROUP-NAME> \
   --vnet-name <VNET-NAME> \
   --name <SUBNET-NAME> \
   --query id \
   --output tsv)
We will create an Azure Active Directory (Azure AD) service principal for use with the cluster, and assign the Contributor role for use with the VNet. Make sure
SERVICE-PRINCIPAL-NAMEis something recognisable, for example,binderhub-sp.SP_PASSWD=$(az ad sp create-for-rbac \ --name <SERVICE-PRINCIPAL-NAME> \ --role Contributor \ --scopes $VNET_ID \ --query password \ --output tsv) SP_ID=$(az ad sp show \ --id http://<SERVICE-PRINCIPAL-NAME> \ --query appId \ --output tsv)
You will need Owner role on your subscription for this step to succeed.
Create an AKS cluster.
At this stage, you may wish to think about customising your deployment. This article helps you to deploying a Kubernetes cluster to Azure with autoscaling and multiple nodepools. These instructions can be combined so that all nodepools can autoscale.
The following command will request a Kubernetes cluster within the resource group that we created earlier.
az aks create \
   --name <CLUSTER-NAME> \
   --resource-group <RESOURCE-GROUP-NAME> \
   --ssh-key-value ssh-key-<CLUSTER-NAME>.pub \
   --node-count 2 \
   --node-vm-size Standard_D2s_v3 \
   --service-principal $SP_ID \
   --client-secret $SP_PASSWD \
   --dns-service-ip 10.0.0.10 \
   --docker-bridge-address 172.17.0.1/16 \
   --network-plugin azure \
   --network-policy azure \
   --service-cidr 10.0.0.0/16 \
   --vnet-subnet-id $SUBNET_ID \
   --output table
Note: Only 2 Node count is for Azure free teir
where:--nameis the name you want to use to refer to your cluster--resource-groupis the ResourceGroup you created--ssh-key-valueis the ssh public key created--node-countis the number of nodes you want in your Kubernetes cluster--node-vm-sizeis the size of the nodes you want to use, which varies based on what you are using your cluster for and how much RAM/CPU each of your users need. There is a list of all possible node sizes for you to choose from, but not all might be available in your location. If you get an error whilst creating the cluster you can try changing either the region or the node size.--service-principalis the application ID of the service principal we created--client-secretis the password for the service principal we created--dns-service-ipis an IP address assigned to the Kubernetes DNS service--docker-bridge-addressis a specific IP address and netmask for the Docker bridge, using standard CIDR notation--network-pluginis the Kubernetes network plugin to use. In this example, we have used Azure’s own implementation.--network-policyis the Kubernetes network policy to use. In this example, we have used Azure’s own implementation.--service-cidris a CIDR notation IP range from which to assign service cluster IPsvnet-subnet-idis the application ID of the subnet we createdThis command will install the default version of Kubernetes. You can pass
--kubernetes-versionto install a different version.
This should take a few minutes and provide you with a working Kubernetes cluster!
If you’re using the Azure CLI locally, install kubectl, a tool for accessing the Kubernetes API from the commandline:
az aks install-cli
Note: kubectl is already installed in Azure Cloud Shell.
Get credentials from Azure for
kubectlto work:az aks get-credentials \ --name <CLUSTER-NAME> \ --resource-group <RESOURCE-GROUP-NAME> \ --output table
where:
--nameis the name you gave your cluster--resource-groupis the ResourceGroup you created
This automatically updates your Kubernetes client configuration file.
Check if your cluster is fully functional
kubectl get node
The response should list three running nodes and their Kubernetes versions! Each node should have the status of
Ready, note that this may take a few moments.


Comments
Post a Comment